
|
TopNax |
Just Add...Water? |
|
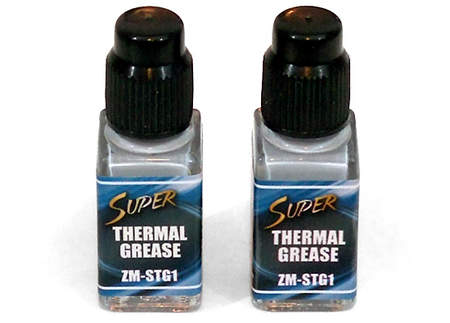
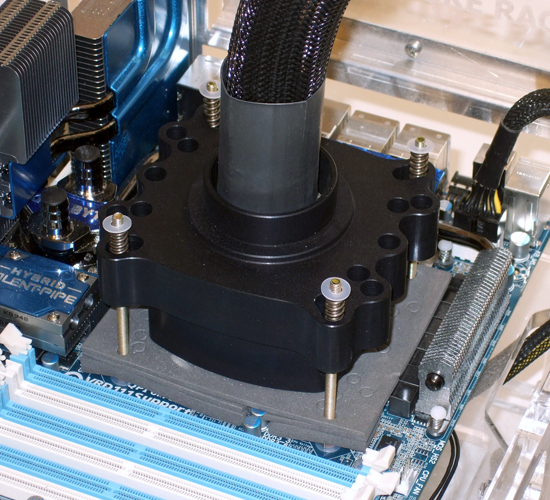
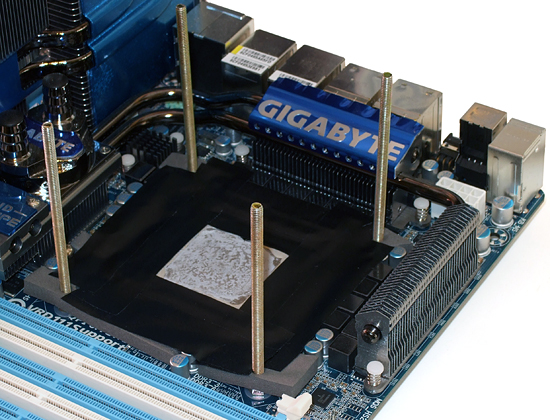
Somewhere between the previous page and this page we brushed a layer of Zalman’s ZM-STG1 thermal grease onto the top of our CPU. Four springs fit over the support assembly’s screws, sliding into recesses on the mounting block. These are topped by four more plastic washers.
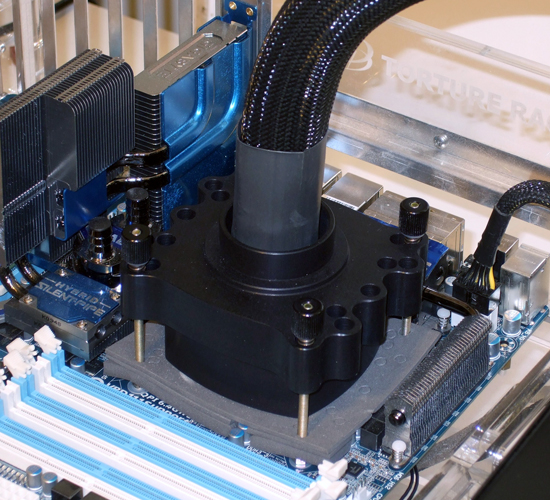
Four nuts compress the mounting springs, allowing the unit to self-center the evaporator’s pressure against the CPU.
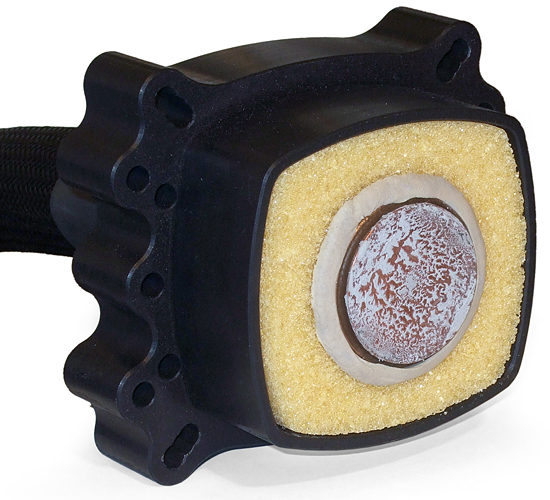
The Cooler Express manual reminds us that it’s important to dry the motherboard at the end of every day. Hoping to get through a day’s testing before enough water accumulated to short-circuit our CPU or motherboard, we fired the system up and began testing. Around four hours passed before the system started throwing wild errors.
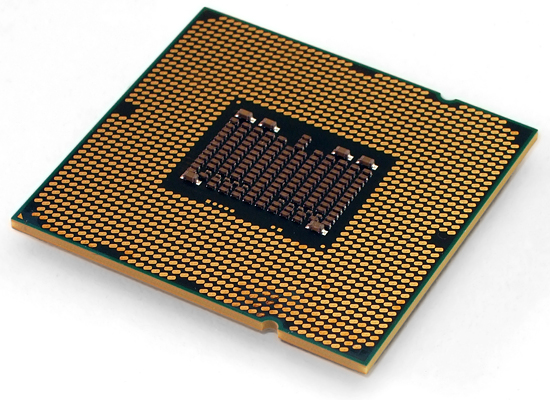
Several of the processor’s contacts were darkened, but the system still worked. We obviously needed to take greater precautions than those recommended by the installation guide. |
Reworking The Installation |
|
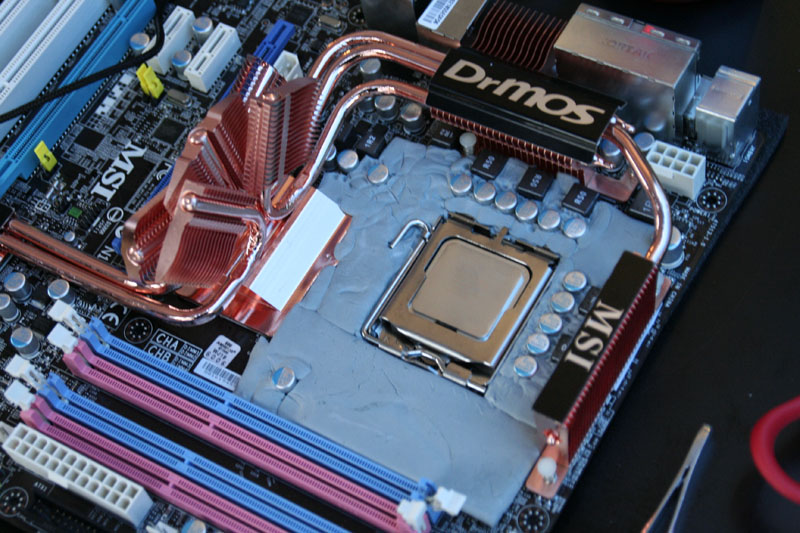
We’ve already proven that we’re not afraid to risk a little “free hardware” to prove a point, and we’re completely familiar with methods that would have prevented condensation from accumulating in fragile areas. These methods include painting the entire board with nonconductive sealant, sealing the entire area around the CPU with nonconductive putty such as kneaded eraser, and filling the LGA with dielectric grease. Unfortunately, most of these solutions cannot be completely removed from the motherboard. While we only needed our system to run for 12-hour intervals, we do recommend most of these precautions for extended use.
The one drop of water that stopped the system had left a trail, starting at the evaporator and running past the round hole in the foam barrier, down the side of our CPU socket, and into the Land Grid Array (LGA). Nonconductive putty was added to fill the gap between the CPU’s heat spreader and socket’s pressure plate.
A new layer of tape seals the CPU area to the reinstalled, custom-cut foam layers. The foam sheet with the round hole was reinstalled over this tape.
A bead of putty fills the space between the evaporator’s mounting block and top foam sheet. These minor changes allowed our system to run eight, but not the full twelve hours between dry-offs. Removing the CPU after an eight-hour test session revealed drops of condensation on each of its 1366 contact pads. Air circulating under the CPU was the problem, and that problem can be solved by filling the LGA with dielectric grease. Petroleum jelly makes an adequate substitute for dielectric grease when used at moderate to low temperatures, such as those experienced with sub-ambient CPU cooling systems.
As seen in our 2008 Overdrive Competition, applying putty around the CPU socket is another option to further prevent air from getting underneath it. Unfortunately, voltage regulator chokes immediately adjacent to the socket of the motherboard we used today would have severely obstructed such work. |
Basic Overclocking |
|
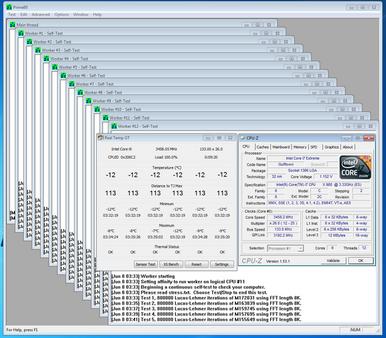
The Core i7-980X might be labeled as a 3.33 GHz model, but Intel's Turbo Boost technology automatically increases its clock rate to either 3.60 GHz or 3.47 GHz, depending on the number of cores being used. The screen shot below doesn’t show exactly 3,466 MHz because Gigabyte doesn’t set its base clock to a proper 133.33 MHz. With a default base clock of around 135 MHz, choosing manual settings to reach Intel’s intended 133.333 MHz base clock results in an actual clock speed of 133.0 MHz. Notice that the highest temperature reached by our CPU at stock settings was measurable, exceeding the lowest-possible reading of its DTS (digital thermal sensor) at -12° Celsius. While we couldn’t track temperatures this cold in real time, the fact that they occasionally exceeded the minimum threshold tells us that the CPU core is much warmer than the -50° evaporator temperature reported by the Cooler Express status monitor.
I dropped my personal test voltage limit for Intel's 32 nm technology to 1.35V after a rash of blown processors swept Tom’s Hardware labs at settings as low as 1.375V. But those articles used air cooling, and processors do gain some voltage tolerance as temperatures are lowered. Today we use my air-cooled 1.35V limit as the starting point for our chilled-overclocking effort.
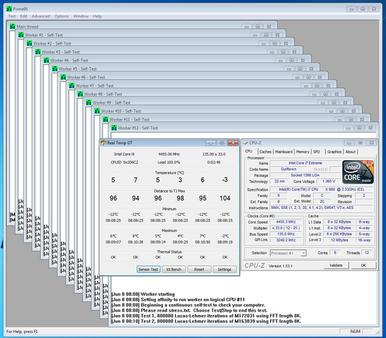
A modest 1.35V is already pushing our CPU temperature into positive numbers at full load, and we’re beginning to wonder whether surface imperfections on the evaporator will need to be addressed if we’re to maintain useful temperatures going forward. The CPU is coping admirably, reaching 4.46 GHz at 100% stability.
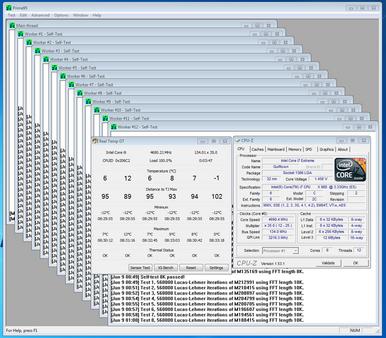
Our next step is 1.45 volts, which yields a stable 4.69 GHz at full load with Intel Hyper-Threading turning our six physical cores into twelve logical cores. Temperatures are still acceptable, climbing only a few degrees from our 1.35V results. Normal caution would have us stop here, but we’re committed to finding this processor’s limit or reaching 5 GHz, whichever comes first. |
Reaching The Goal |
|
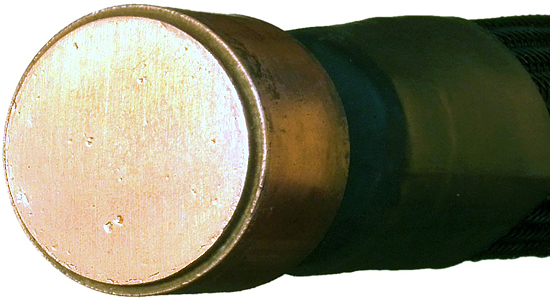
A little more testing revealed 4.9 GHz at 1.60V and new thermal stability limits. Even the slightest increase voltage would cause our CPU to reset at 39° Celsius, and even the slightest increase in speed would lower the temperature at which our CPU reset. We had to get our temperatures down. Reports from several cooling sites show that the latest compounds can reduce temperatures by up to 4° compared to Zalman’s ZM-STG1, yet our testing showed that a drop of at least 10° would be required to reach full CPU stability at 5 GHz. The logical next step would have been to smooth the evaporator’s mating surface through processes such as precision sanding and lapping, but we weren’t certain how thick this surface was and didn’t want to risk damaging a borrowed product.
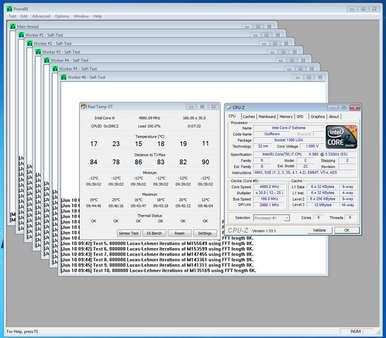
We finally reached our 5 GHz goal not by increasing thermal transfer speed, but by reducing heat. Disabling Intel's Hyper-Threading technology dropped us from twelve logical to six physical cores, while simultaneously dropping CPU temperatures by nearly 20°.
The Core-i7 980X has completely unlocked multipliers, yet no multiplier exists to reach 5 GHz at the stock 133 MHz base clock. We also wanted to retain a consistent memory data rate to assure accurate assessment of CPU performance. Increasing our base clock from exactly 133.333 to 166.666 MHz would have been a perfect solution, using a CPU multiplier of 30 and a DRAM multiplier of 4 to reach 5.00 GHz and DDR3-1333. Gigabyte doesn’t use fractional base clock frequencies however, so the actual base clock was increased from 133.0 to 166.0 MHz. |
Benchmark Results: 3D Games |
|
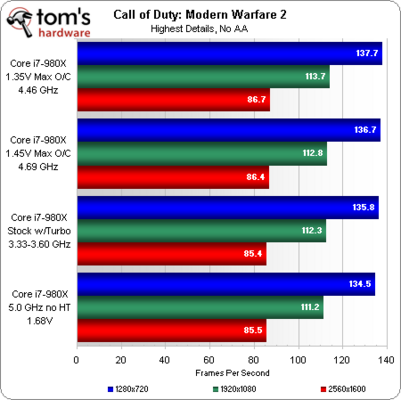
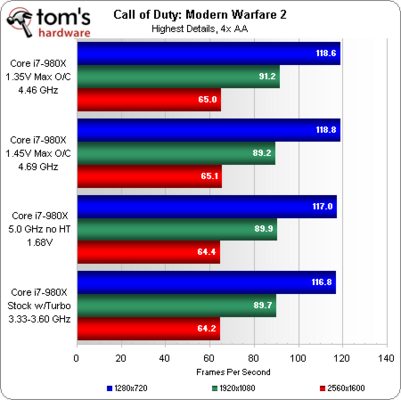
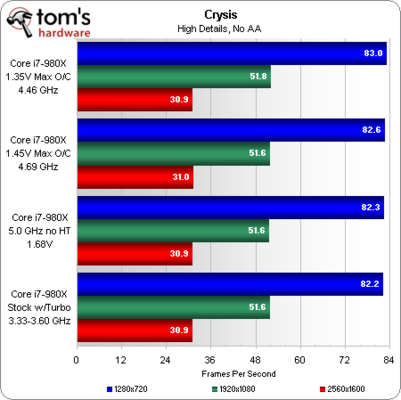
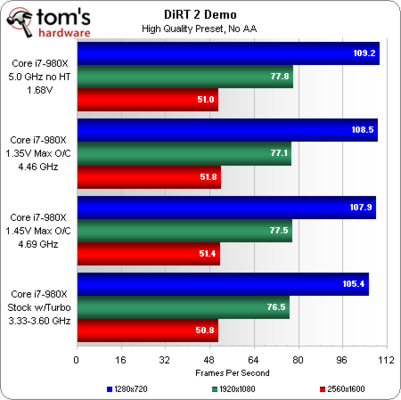
We put hours into running our game benchmarks, but to no avail. Our current benchmark set is so GPU-bound that most of the differences aren’t worth showing, let alone discussing. Previous graphics tests have shown that high-end multi-GPU configurations are the only way to break past this barrier at high-quality game settings, but that level of graphics power is not currently available at this lab. Click on any of the images to reveal details at full-scale.
The seventh image above shows the largest game performance difference of less-than 4% occurring at our lowest test settings in the S.T.A.L.K.E.R.: Call of Pripyat benchmark. Beyond that, this CPU is too powerful at stock speeds to show noticeable performance differences. |
|
Test System Configuration |
|
|
CPU |
Intel Core i7-980X Extreme LGA 1366, 3.33 GHz, 12MB L3 Cache |
|
Motherboard |
Gigabyte GA-X58A-UD7, Intel X58 Express Chipset, LGA 1366 |
|
RAM |
Kingston KHX16000D3ULT1K3/6GX (6GB), DDR3-2000 at DDR3-1333 CAS 7-7-7-20 |
|
Graphics |
Sapphire Radeon HD 5850 1GB |
|
Hard Drive |
Western Digital RE3 WD1002FBYS, 1TB |
|
Sound |
Integrated HD Audio |
|
Network |
Integrated Gigabit Networking |
|
Power |
Corsair CMPSU-850HX 850W Modular, ATX12V v2.2, EPS12V, 80 PLUS Gold |
|
Software |
|
|
OS |
Microsoft Windows 7 Ultimate x64 |
|
Graphics |
AMD Catalyst 10.5 |
|
Chipset |
Intel INF 9.1.1.1020 |
|
Benchmark Configuration |
|
|
3D Games |
|
|
Crysis |
Patch 1.2.1, DirectX 10, 64-bit executable, benchmark tool |
|
DiRT 2 Demo |
In-game benchmark |
|
Call of Duty: Modern Warfare 2 |
Campaign, Act III, Second Sun (45 seconds FRAPS) |
|
S.T.A.L.K.E.R.: Call Of Pripyat |
Call Of Pripyat Benchmark version |
|
Audio/Video Encoding |
|
|
iTunes |
Version:9.0.2.25 x64 |
|
Handbrake 0.9.4 |
Version 0.9.4, convert first .vob file from The Last Samurai (1.0 GB) to .mp4, High Profile |
|
TMPEGEnc 4.0 XPress |
Version: 4.7.3.292 |
|
DivX Codec 6.9.1 |
Encoding mode: Insane Quality |
|
XviD 1.2.2 |
Display encoding status = off |
|
MainConcept Reference 1.6.1 |
MPEG2 to MPEG2 (H.264), MainConcept H.264/AVC Codec, 28 sec HDTV 1920x1080 (MPEG2), Audio: MPEG2 (44.1 KHz, 2 Channel, 16-Bit, 224 Kb/s), Mode: PAL (25 FPS) |
|
Productivity |
|
|
Adobe Photoshop CS4 |
Version: 11.0 x64, Filter 15.7MB TIF Image |
|
Autodesk 3ds Max 2010 |
Version: 11.0 x64, Rendering Dragon Image at 1920x1080 (HDTV) |
|
Grisoft AVG Anti-Virus 9.0 |
Version: 9.0.663, Virus base: 270.14.1/2407, Benchmark: Scan 334MB Folder of ZIP/RAR compressed files |
|
WinRAR 3.90 |
Version x64 3.90, Dictionary = 4,096 KB, Benchmark: THG-Workload (334MB) |
|
7-Zip |
Version 4.65: Format=Zip, Compression=Ultra, Method=Deflate, Dictionary Size=32KB, Word Size=128, Threads=8 |
|
Synthetic Benchmarks and Settings |
|
|
3DMark Vantage |
Version: 1.0.1, GPU and CPU scores |
|
PCMark Vantage |
Version: 1.0.1.0 x64, System, Productivity, Hard Disk Drive benchmarks |
|
SiSoftware Sandra 2010 |
Version 2010.1.16.11, CPU Test = CPU Arithmetic / MultiMedia, Memory Test = Bandwidth Benchmark |
